Every zipline is really just a cable stretched between two anchor points — but that cable is only as strong as the connections at its ends. Those connections are made by a handful of small, easy-to-overlook pieces of hardware: thimbles (teardrop-shaped metal inserts that protect the cable where it bends around a shackle or anchor), wire rope clamps (also called clips or U-bolts, the U-shaped fasteners that grip the cable back on itself), and swaged or crimped sleeves (metal tubes pressed permanently around the looped cable end using a dedicated tool). Together, these components form the “termination” — the finished end of the cable. Get this right and the termination holds at or near the cable’s rated breaking strength. Get it wrong and you introduce a failure point that can let go under normal riding loads, often without visible warning.
If you’ve already built a starter zipline and are now sizing up a longer, heavier-duty span — or if you’re spec’ing a commercial or semi-commercial installation — this guide is for you. We’ll walk through how each termination method works, where each belongs (and where it doesn’t), the math that governs safe working loads, and the decision rules that determine which hardware to spec for your build.
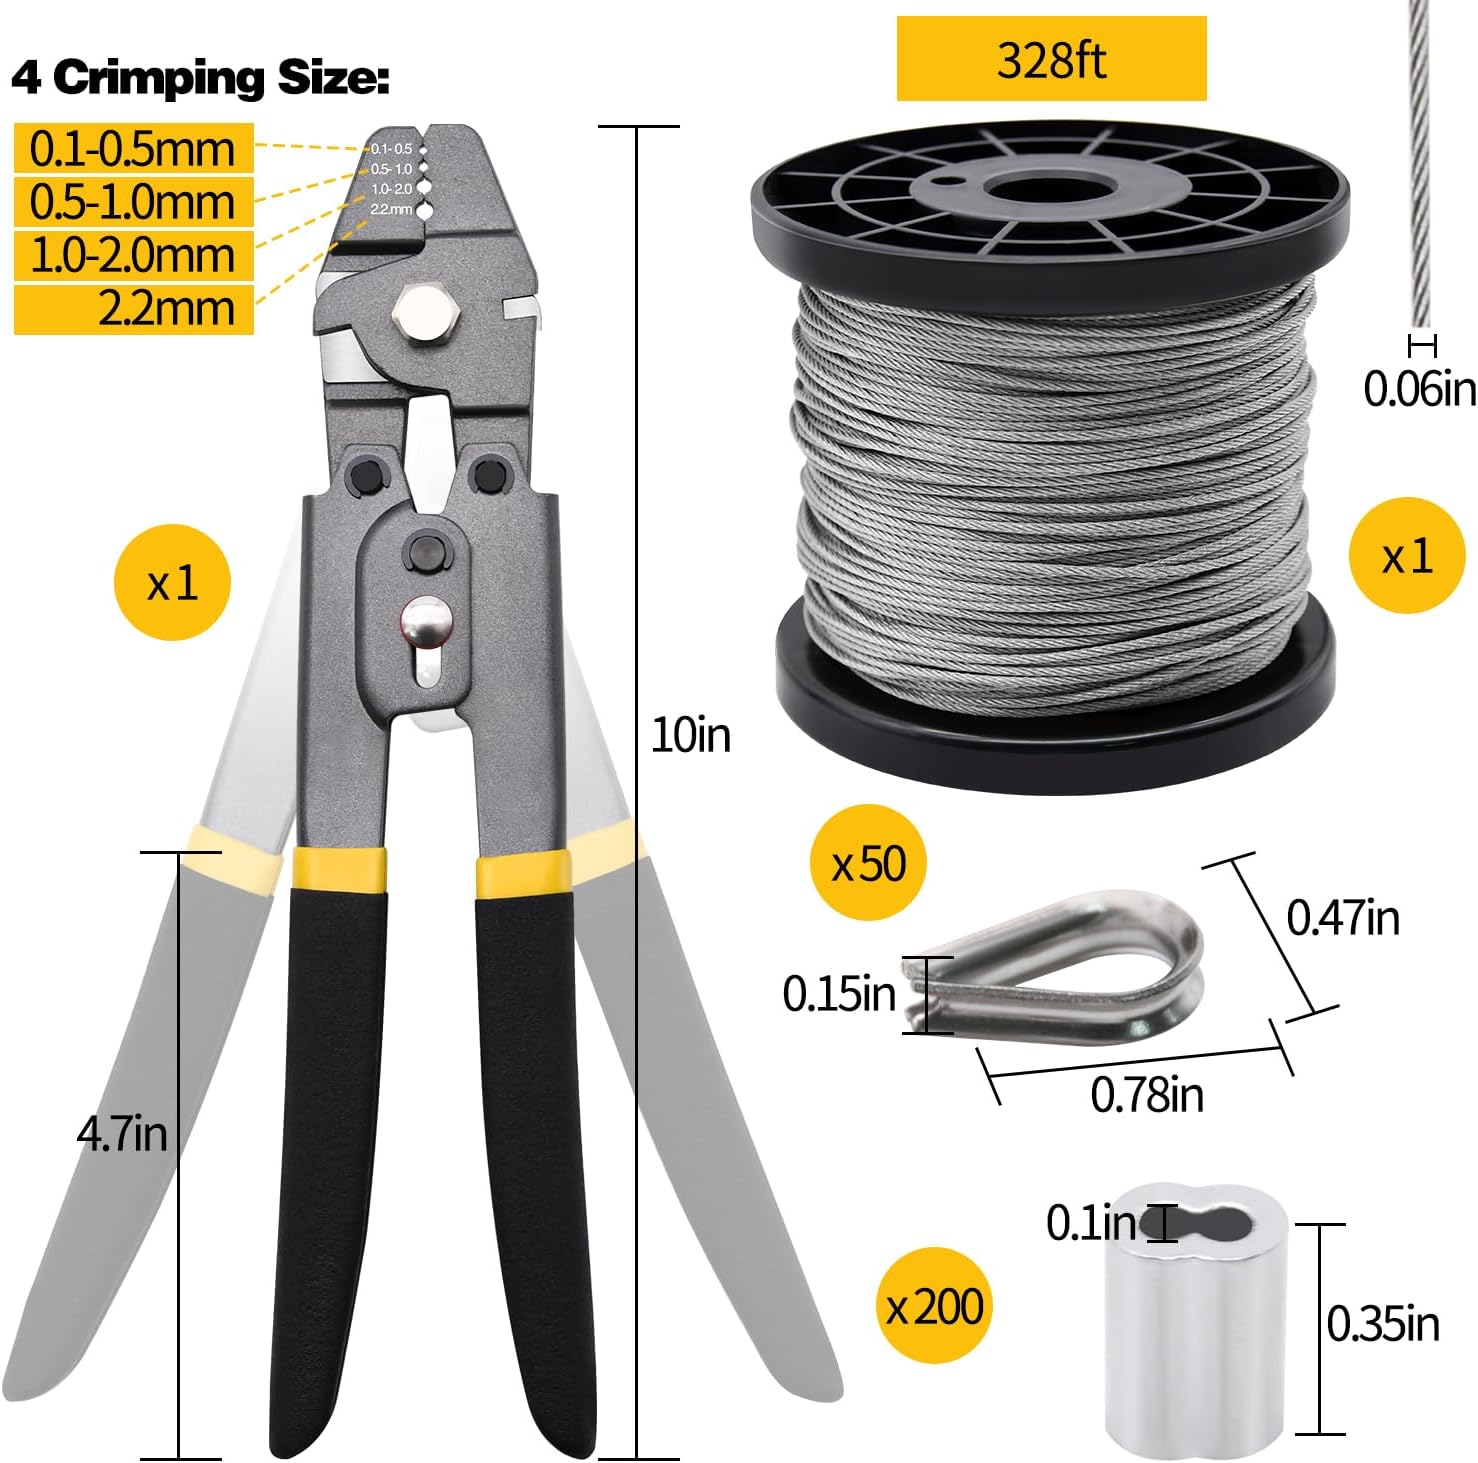
| EDITOR'S PICK1/4 Stainless Steel Cable | Mid-tier328ft Wire Rope Crimping Tool K… | Budget pick1/8 Inch Stainless Steel Wire R… | |
|---|---|---|---|
| Cable Dia. | 1/4 in | 1/16 in | 1/8 in |
| Length | 25 ft | 328 ft | 100 ft |
| Breaking Str. | 6400 lbs | — | — |
| Strand Count | 7x19 | — | 7x7 |
| Clamps/Clips | ✓ | ✗ | ✓ |
| Crimping Tool | — | ✓ | — |
| Price | $28.69 | $27.99 | $22.79 |
| See on Amazon → | See on Amazon → | See on Amazon → |
How Terminations Fail — and Why It Matters More Than Cable Grade
The intuitive worry is cable breaking mid-span. In practice, that’s rare with properly sized wire rope. What SaferParks’ zipline incident data consistently flags is hardware failure at the termination points — fittings that were installed incorrectly, undersized for the cable diameter, or degraded by corrosion at the point where the cable bends over a bare bolt.
There are three failure modes worth understanding:
Cutting and kinking. When cable bends sharply around a hard edge — a bolt, a carabiner gate, a poorly fitted shackle — the outer strands take a permanent kink. That kink concentrates stress every time the cable is loaded. A thimble prevents this by providing a smooth, rounded bearing surface sized to the cable’s bend radius.
Clip-induced cable crushing. A wire rope clamp (U-bolt style) grips by pressing the cable between the U-bolt saddle and the flat plate (called the “live end saddle”). If the U-bolt is positioned over the live end of the cable (the side under load) rather than the dead end (the short tail), the saddle crushes the working wire strands. The old installer’s phrase for correct orientation — “never saddle a dead horse” — means the saddle goes on the live wire, the U-bolt over the tail. Per the Wire Rope Technical Board’s Wire Rope Users Manual (Fifth Edition), a single misoriented clip can reduce termination strength by 40% or more.
Sleeve failure from improper tooling. Swaged (aluminum or copper) sleeves depend entirely on achieving the correct die geometry and compression force during installation. An under-pressed sleeve — common when builders use a generic bolt cutter or pliers instead of a calibrated swaging tool — may look solid but can pull through at a fraction of rated load.
Thimbles, Clamps, and Sleeves: Matching Method to Application
Thimbles — The Non-Negotiable Foundation
A thimble is not itself a termination method; it’s a protective insert used inside any cable loop. For zipline use, every looped end of the cable should contain a correctly sized thimble. Sized means matched to the cable diameter: a thimble rated for 3/8” cable used on 1/4” cable will rock and pivot, concentrating wear; the reverse leaves no room for the cable to seat.
For most residential intermediate builds (1/4” to 5/16” cable, spans up to ~150 ft), hot-dip galvanized steel thimbles are adequate. For coastal or wet environments, or for stainless steel cable runs, use 316 stainless steel thimbles. Mixing galvanic compatibility — galvanized thimble against stainless cable — accelerates corrosion at exactly the point where you least want it.
Heavy-duty or “extra-heavy” thimbles are worth the modest cost premium on any span where the trolley generates shock loading — abrupt rider braking, bungee-brake systems, or multi-rider trolleys. Standard thimbles have a lighter wire form; heavy-duty variants are formed from thicker stock and deform less under repeated load cycles. Operators in long-run commercial reviews consistently note that standard thimbles show measurable deformation after a single season of high-cycle use; heavy-duty thimbles in the same applications remain serviceable for multiple seasons.
Wire Rope Clamps (U-Bolt Clips)
Clips are the most accessible termination for the intermediate DIY builder: no special tooling, available at any hardware store or rigging supplier, and re-adjustable if you need to re-tension the span. Their trade-off is that they require correct installation, periodic retorquing, and more inspection attention than swaged sleeves.
Number of clips required is not optional math. Per the Wire Rope Technical Board’s guidelines, the minimum clip count by cable diameter is:
| Cable Diameter | Minimum Clips | Minimum Spacing | Retorque After First Load |
|---|---|---|---|
| 1/4” | 3 | 3” | Yes, within first 24 hrs |
| 5/16” | 3 | 3-3/4” | Yes |
| 3/8” | 4 | 4-1/2” | Yes |
| 7/16” | 4 | 5-1/4” | Yes |
These minimums assume correctly sized, properly torqued clips. Under-torquing — a common mistake when builders hand-tighten without a torque wrench — leaves the termination intact-looking but vulnerable to slipping under load.
Clip-based terminations are appropriate for residential builds, DIY enthusiast spans up to about 200 feet, and any installation you plan to reconfigure or re-tension seasonally. They are not appropriate for commercial or semi-commercial installations where ACCT Standards require terminations with documented and tested efficiencies — swaged fittings meet this bar; clip terminations generally do not without engineering sign-off.
Swaged and Pressed Sleeves
A swaged sleeve (sometimes called a Nicopress or Talurit sleeve, after common brand and process names) is an aluminum or copper oval pressed permanently around the doubled cable using a calibrated die. When properly executed, published specifications from major rigging manufacturers rate correctly swaged terminations at 95–100% of the cable’s catalog breaking strength — essentially eliminating the termination as a weak point.
The critical qualifier is properly executed. The swaging die must match the sleeve size (and by extension cable diameter) exactly. A Go/No-Go gauge — a small measurement tool used to verify the pressed sleeve reached the correct final dimensions — should be used on every sleeve. Without gauging, there’s no reliable way to confirm full compression.
For intermediate builders stepping up to 3/8” or 1/2” stainless cable for longer or heavier-span builds, manual (ratcheting) swaging tools in the $150–$300 range are available from rigging suppliers. For stainless cable specifically, stainless or copper sleeves must be used — aluminum sleeves on stainless cable create a galvanic corrosion pair that degrades the sleeve from the inside.
Swaged terminations are the preferred method for:
- Any span over ~200 feet
- Stainless steel cable (especially 316 for coastal/wet sites)
- Commercial or camp installations where ACCT or ASTM F2959 compliance is a requirement
- Multi-rider trolleys or systems where shock loading is routine
The Working Load Math You Need to Do Before You Build
The CPSC’s Handbook for Public Playground Safety and ASTM F2959 both reference a design factor (also called safety factor) for overhead-supported equipment. For ziplines, the industry standard cited in ACCT’s 10th Edition Standards is a minimum 10:1 safety factor between the system’s maximum anticipated load (rider weight + dynamic factor) and the weakest component’s rated breaking strength.
By the numbers — a worked example:
- Rider weight: 250 lbs
- Dynamic load factor (for zipline braking loads): 2× to 3× static weight; use 3× for inline brakes
- Design load: 250 × 3 = 750 lbs
- Required minimum breaking strength at 10:1: 750 × 10 = 7,500 lbs
- 3/8” 7×19 galvanized steel cable: catalog breaking strength ~14,400 lbs ✓
- 3 clips at 80% efficiency: effective breaking strength ~11,520 lbs ✓ (still above threshold)
- 3 clips at 65% efficiency (misinstalled): ~9,360 lbs — margin tightens significantly
Petzl’s technical documentation on connecting components reinforces this principle from the hardware side: every connector in the system — carabiners, shackles, swivels — must be verified against the same design load, not just the cable itself. A correctly swaged 1/2” cable assembly mated to an undersized shackle is only as strong as the shackle.
Inspection and Maintenance: What to Look for at Each Termination
Even a correctly installed termination degrades. The inspection interval recommended by SaferParks’ incident data analysis is before each use season (minimum) and after any high-load event — a hard stop, a bottoming-out trolley, or any visible deformation.
At each termination, check for:
- Thimble deformation or rotation — a thimble that has shifted inside the loop has allowed the cable to kink against a hard edge
- Clip torque — U-bolt clips must be retorqued to spec (consult the manufacturer’s torque table by diameter) after first loading and annually thereafter
- Cable crown wires at the clip saddle — broken wires at or just inside the clip indicate either over-torquing or fretting
- Sleeve surface cracking or elongation — a swaged sleeve that has stretched lengthwise is pulling through and must be replaced immediately
- Corrosion at the cable-thimble interface — this is the highest-moisture zone of the termination; even galvanized hardware corrodes faster here due to crevice moisture retention
Decision Rules: Which Termination for Your Build
If your build is a residential backyard span under 150 feet, cable 1/4”–5/16”, designed for riders under 150 lbs: galvanized thimbles plus correctly installed 3-clip terminations are serviceable — spec at least 3 clips per end, torque to the Wire Rope Technical Board’s published specs, and retorque after the first season load.
If your build is a DIY enthusiast span 150–300 feet, cable 5/16”–3/8”, adult riders up to 250 lbs: move to swaged sleeves. The efficiency gain (80% clips vs. 95%+ swaged) meaningfully improves your margin against the 10:1 design factor. Rent or purchase a properly sized swaging tool; use a Go/No-Go gauge on every sleeve.
If you’re specifying a commercial, camp, or eco-resort installation, any span, any cable size: swaged terminations are the baseline expectation under ACCT Standards and ASTM F2959. Clip-based terminations at this level require written engineering justification. Use 316 stainless cable with stainless or copper sleeves, heavy-duty stainless thimbles, and document every termination with pre-installation and post-installation diameter measurements. Petzl and Kong hardware catalogs both publish minimum breaking strengths for their connecting hardware in formats compatible with ACCT audit documentation.
The terminal end of your zipline is the terminal point of your liability exposure. The hardware cost difference between a marginal clip termination and a properly swaged assembly with gauged sleeves is often under $30 per end. The performance and documentation difference is not comparable.